I wanted to make a card with a difference and came across the idea of a Turkish Fold for the insert. I am grateful to Susan Angebranndt for the instructions for this fold, which can be found on her blog HERE. I used a piece of copy paper and decorated it using stamps by Claritystamp.
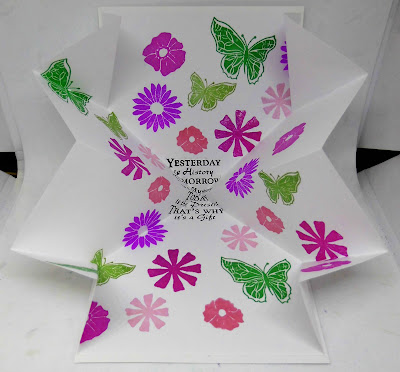
I started by cutting a piece of copy paper to 8" x 8" (to fit into a 4" x 4" card). I stamped the Yesterday is History stamp in the centre in Onyx Black Versafine ink.
 I chose a selection of solid flower stamps from Tina's Doodle Flowers, the Birds & Flower Rows and NDC #99 and stamped them in Archival ink (Cactus Flower, Vibrant Fuchsia, Pink Peony, Magenta Hue and Rose Madder).
 I also added the two smallest butterflies from the Butterfly Tree stamp set in Leaf Green and Emerald Green.
 To create the fold for the insert, I first folded the paper in half.
 Once unfolded, I folded each diagonal in turn.

 Next, the centre fold was reversed and the corners pushed in to the centre so that the insert looked like this.
 The 'wings' of the top and bottom sections were folded into the centre.
 These were then unfolded, the folds reversed and the wings pushed in towards the centre of the insert.
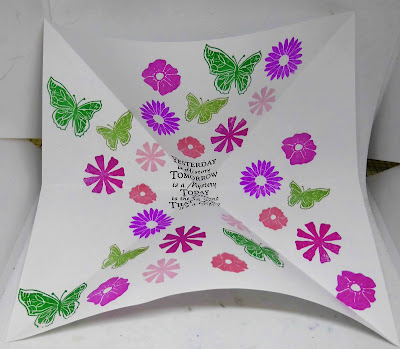
 This is the shape of the completed insert.

I created a 4" x 4" card blank from a piece of hammered white card (8" x 4" scored in half) and glued the insert inside with the point in towards the fold.
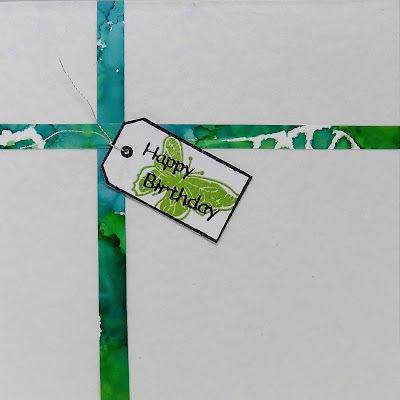
 As the inside of the card is the star of the show, I decided to keep the outside of the card simple. I had a piece of Yupo paper left over from another project (see HERE).
 I cut two thin strips from the side and added them to the front of the card (with the fold at the top).
 I stamped the smallest tag from the Tag set in Onyx Black Versafine ink onto a separate piece of card and added the smallest butterfly in Leaf Green Archival ink.

This was fussy cut, A Happy Birthday black peel off and some gold thread added, then stuck onto the front of the card.
 As I had made a card blank, I made a custom envelope to match. I cut a piece of 8" x 8" patterned paper down to 17cm x 17cm and scored along the 'B' line of my envelope maker four times, turning the card each time. This was folded and glued together with the pattern on the inside. I decorated the front and back of the envelope using some of the flowers and inks used for the insert.
 This was a fun project which could easily be adapted for any occasion by changing the choice of stamps and colours.
 |
| The finished insert |
 |
| The outside of the card |
I started by cutting a piece of copy paper to 8" x 8" (to fit into a 4" x 4" card). I stamped the Yesterday is History stamp in the centre in Onyx Black Versafine ink.


I created a 4" x 4" card blank from a piece of hammered white card (8" x 4" scored in half) and glued the insert inside with the point in towards the fold.


This was fussy cut, A Happy Birthday black peel off and some gold thread added, then stuck onto the front of the card.


3 comments:
I like fancy folds and this one is clever. You have made a lovely card Sarah with a surprise inside. Thanks for the instructions.x
What a great card that could be used for anybody of any age. Thanks for showing us how to fold the insert.
Love it, that insert is a great way to add interest to the inside. Xx
Post a Comment