I was originally going to create a one layered card using stamping, masking and use of a gel plate, however, messy fingers lead to me adding the stamped images to a kraft card blank instead. I actually prefer what I ended up with, so making a mistake needn't ruin a project.
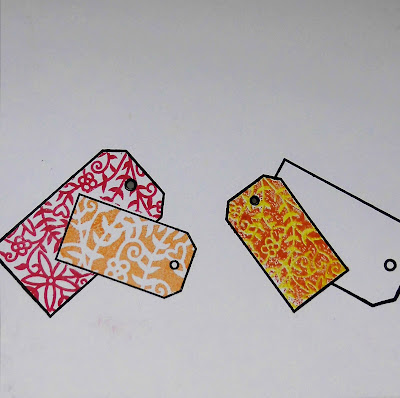
 I stamped the second smallest tag from the Clarity stamp set onto 7" x 7" stencil card and used the outer mask to isolate the image.

 Next, I added Orange Popsicle Artistry ink to the rectangle gel press petite. With the small Floral Forest stencil laid over the aperture, I pressed the gel plate over the opening.
 I masked the first image with the matching mask inner and stamped the larger tag to the left hand side. Having used the mask outer to isolate the second tag I stamped the #2 Floral Forest line art stamp through the aperture in Blaze Artistry ink.

 I continued adding tags in the same manner, masking as required. The next tag added was decorated using the #2 line art stamp in Hay Stack followed by the #3 background stamp in Fall Fiesta over the top.

 The second largest tag was then added 'behind' repeating the gel press technique in Blaze ink.
 I used the largest tag in the set to fill in across the centre, stamped in Hay Stack (#2 line art stamp) and Fall Fiesta (#3 background stamp). I used post it notes as additional masks for this last section.
 I decided to go back over the left hand tag with the #3 background stamp in Orange Popsicle to balance the colours and tags.
 Next, I added 'Thank You' using stamps from the mini word chains 17 & 18 in Onyx Black Versafine ink and heat embossed the lettering in clear embossing powder.
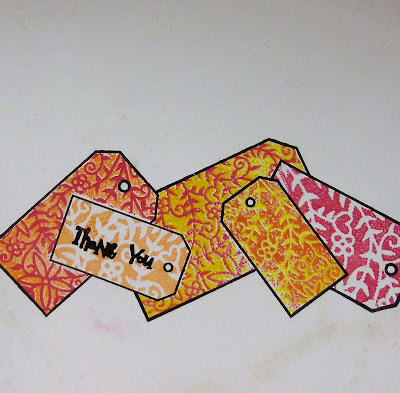 It was at this point that I managed to smear red ink off my fingers onto the card front. I wasn't prepared to let all that hard work go to waste, so cut out the strip of tags and added them to the front of a 7" x 7" kraft card blank.
 I added 'so Very Much' in the smae manner as before directly onto the card front below the tags.
 To finish, I used the A5 Floral Forest stencils and gently brushed Hay Stack and Blaze inks across the top and the bottom of the card.


1 comment:
Just realised after commenting on Wednesday blog that I hadn't read this one. I had dashed out early to be at Maria's Groovi class in Evesham & then went out late afternoon to meet friends I used to work with so completely forgot when I finally sat down last night. Love the tags, they could be used for various occasions especially men's cards.
Post a Comment